Last update:
A few months ago I wrote an article about Kubernetes Nginx Ingress Controller. That article is actually the second most popular post on this blog. It's focused on using Kubernetes ingress for on-premises deployments. But, most of the users run Kubernetes on AWS and other public cloud providers. The problem is that for each service with LoadBalancer type, AWS will create the new ELB. And that can be pricey. With Kubernetes ingress you will need only one.
How Does it Work?
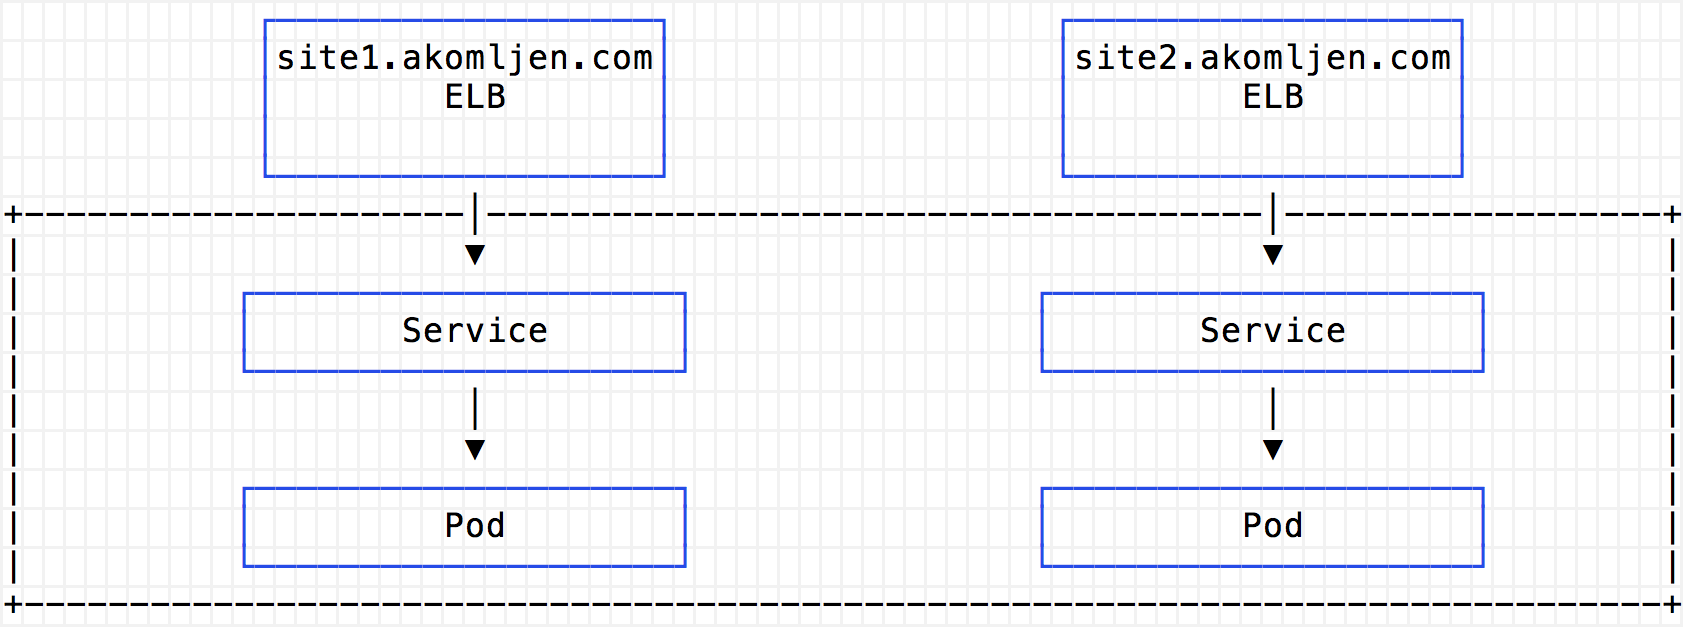
For easier understanding let me show some diagrams. Without an ingress controller you will have one ELB (Classic) per exposed service:
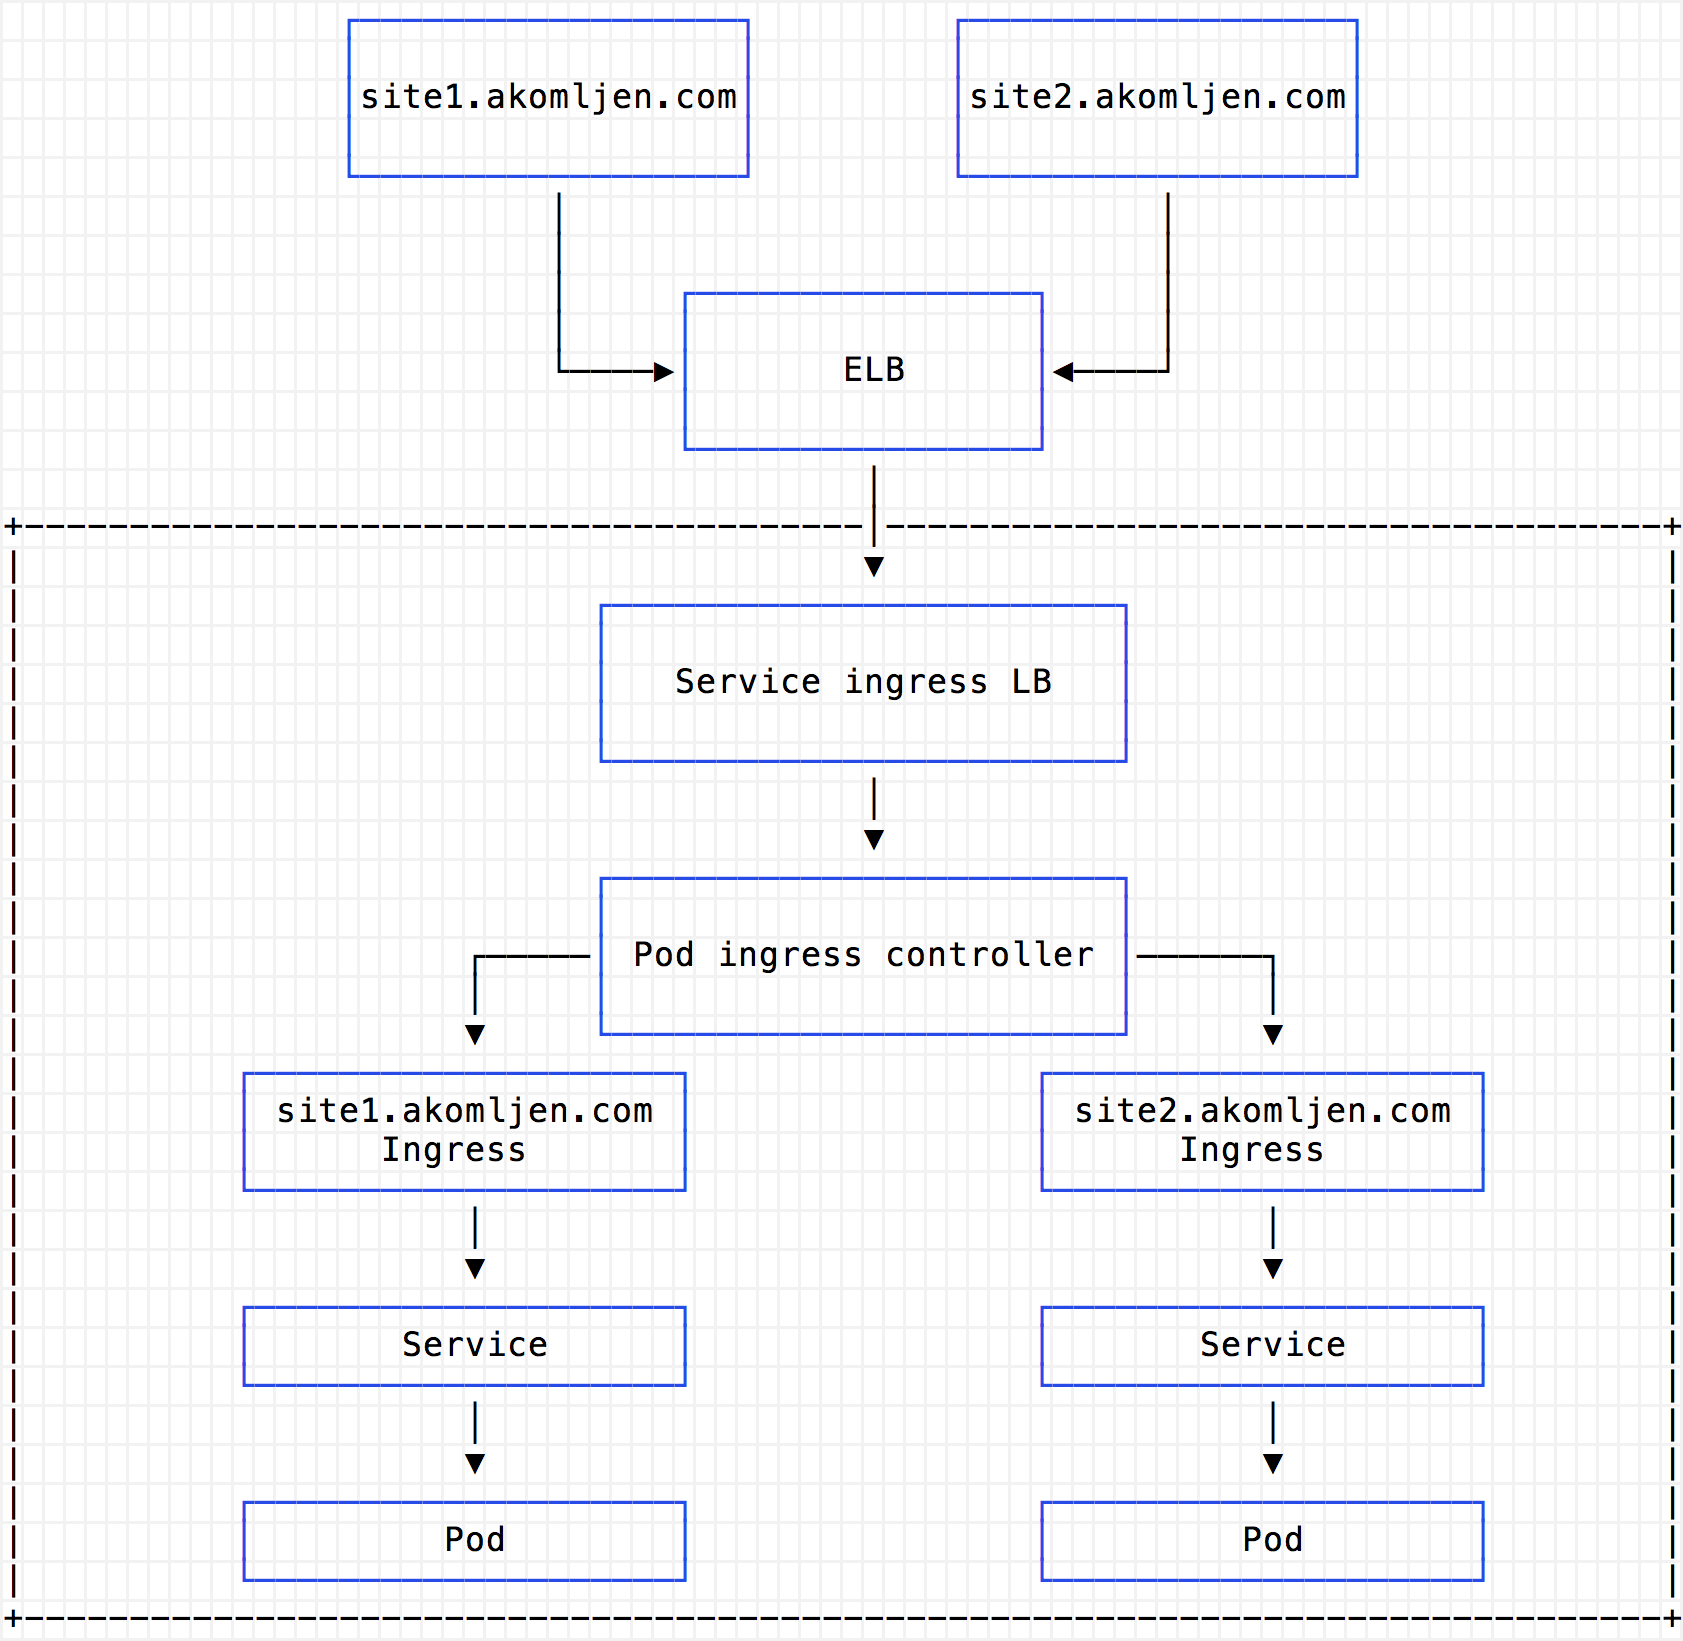
With ingress, you will have only one ELB (Classic) which routes all requests to ingress proxy pod running in your cluster:
Regards Classic Load Balancer pricing:
You are charged for each hour or partial hour that a Classic Load Balancer is running and for each GB of data transferred through your load balancer.
Which means if you are running your cluster in US East region you will pay around 18,25$ per exposed service, plus per GB of data processed. Having an ingress can reduce your AWS costs if you have a lot of exposed services. Of course, you can have more replicas of ingress proxy pod internally for high availability.
Nginx Ingress Deployment
There are a lot of ingress controller options that you can choose, like Traefik, Voyager (for HAProxy), Contour (for Envoy), or something like AWS ALB ingress controller which is a little bit different. For this blog post, I will pick Nginx ingress controller which is probably the most used at the moment. Unlike my first post about Nginx Ingress Controller, I will use Helm for deployment:
⚡ cat > values.yaml <<EOF
controller:
  replicaCount: 2
  config:
    use-proxy-protocol: "true"
  service:
    annotations:
      service.beta.kubernetes.io/aws-load-balancer-proxy-protocol: '*'
EOF

⚡ helm install --name ingress \
    --namespace ingress \
    -f values.yaml \
    stable/nginx-ingress
If you check for your ingress pods you will see two services, controller, and the default backend:
⚡ kubectl get pod -n ingress --selector=app=nginx-ingress
NAME                                                     READY     STATUS    RESTARTS   AGE
ingress-nginx-ingress-controller-8689c87db7-jlwxv        1/1       Running   0          5m
ingress-nginx-ingress-controller-8689c87db7-kv859        1/1       Running   0          5m
ingress-nginx-ingress-default-backend-5f5888cc9b-jdjrp   1/1       Running   0          5m
To explain a few things here. Since all requests will go through ingress controller pod, it is good to have 2 or more replicas. This is your internal proxy basically. The controller uses default backend to route non-existing ingress resources to it. The default backend is pretty light. Also, to get the source IP addresses in ingress proxy logs I enabled Proxy Protocol on both Nginx and ELB with these two settings use-proxy-protocol: "true" and service.beta.kubernetes.io/aws-load-balancer-proxy-protocol: '*'.
The Proxy Protocol is designed to chain proxies without losing the client information.
And a bonus, now you can easily have automatic DNS. First create a wildcard DNS A record *.test.example.com, for example, which will point to the ingress controller ELB. You can get ELB address using this command:
⚡ kubectl get svc ingress-nginx-ingress-controller -o jsonpath='{.status.loadBalancer.ingress[0].hostname}' -n ingress
a00950ebcfd0411e740ee0207cf10ce8-1089949860.eu-west-1.elb.amazonaws.com
Then, when you create ingress with host site1.test.example.com, you can go right ahead and type that into your browser. DNS will resolve the name without any extra configuration. Having a wildcard DNS record isn't the best idea, but it works. For fine-grained DNS configuration, you can use external DNS.
Summary
Ingress controller really helps towards more automation. But, please be aware that if ingress controller fails all your external endpoints are down! In the next post, I will also show you how to get automatic HTTPS with Let's Encrypt. Then you will have automatic DNS with SSL endpoints by default. Stay tuned for the next one.