Last update:
To have a Kubernetes cluster up and running is pretty easy these days. However, when you start to use it and deploy some applications, you might expect some issues over time. Kubernetes being a distributed system is not easy to troubleshoot. You need a proper monitoring solution, and because the Prometheus is CNCF project as Kubernetes, it is probably the best fit. In this post, I will show you how to get the Prometheus running and start monitoring your Kubernetes cluster in 5 minutes.
Prometheus Operator
CoreOS introduced operators as business logic in the first place. I wrote about Elasticsearch operator and how operator works a few months ago so you might check it out. In my opinion, operators are the best way to deploy stateful applications on Kubernetes.
CoreOS team also created Prometheus operator for deploying Prometheus on top of Kubernetes. Here is the official operator workflow and relationships view:

From the picture above you can see that you can create a ServiceMonitor resource which will scrape the Prometheus metrics from the defined set of pods. It instructs Prometheus to watch on a new target. For example, if you have a frontend app which exposes Prometheus metrics on port web, you can create a service monitor which will configure the Prometheus server automatically:
apiVersion: monitoring.coreos.com/v1
kind: ServiceMonitor
metadata:
  name: frontend-app
  labels:
    app: frontend-app
    release: prom
spec:
  namespaceSelector:
    any: true
  selector:
    matchLabels:
      app: frontend-app
  endpoints:
  - port: web
    interval: 10s
NOTE: release: prom is the Helm release name that I used to install the Prometheus operator below!
Installation
For Prometheus installation use the official prometheus-operator Helm chart. This chart has many options, so I encourage you to take a look at default values file and override some values if needed. Among other services, this chart installs Grafana and exporters ready to monitor your cluster.
Let's enable persistent storage for all Prometheus components and also expose Grafana with ingress. I prepared a custom values file to use for installation with Helm:
⚡ cat > custom-values.yaml <<EOF
# Depending on which DNS solution you have installed in your cluster enable the right exporter
coreDns:
  enabled: false

kubeDns:
  enabled: true

alertmanager:
  alertmanagerSpec:
    storage:
      volumeClaimTemplate:
        spec:
          accessModes: ["ReadWriteOnce"]
          resources:
            requests:
              storage: 10Gi

prometheus:
  prometheusSpec:
    storageSpec:
      volumeClaimTemplate:
        spec:
          accessModes: ["ReadWriteOnce"]
          resources:
            requests:
              storage: 10Gi

grafana:
  adminPassword: "YourPass123#"
  ingress:
    enabled: true
    annotations:
      kubernetes.io/ingress.class: nginx
      kubernetes.io/tls-acme: "true"
    hosts:
      - grafana.test.akomljen.com
    tls:
      - secretName: grafana-tls
        hosts:
          - grafana.test.akomljen.com
  persistence:
    enabled: true
    accessModes: ["ReadWriteOnce"]
    size: 10Gi
EOF
Installing Prometheus operator and Prometheus with all dependencies is just one command now:
⚡ helm install \
    --name prom \
    --namespace monitoring \
    -f custom-values.yaml \
    stable/prometheus-operator
NOTE: Kubernetes 1.10+ with Beta APIs and Helm 2.10+ are required!
When you install the Prometheus operator, the new Custom Resource Definition or CRD gets created. You can check for existing CRDs with this command:
⚡ kubectl get crd
NAME                                         AGE
alertmanagers.monitoring.coreos.com          10m
prometheuses.monitoring.coreos.com           10m
prometheusrules.monitoring.coreos.com        10m
servicemonitors.monitoring.coreos.com        10m
Also, to see what each of those does check official design doc. The Prometheus operator manages all of them.
Wait a few minutes and the whole stack should be up and running. Check for all pods in monitoring namespace:
⚡ kubectl get pods -n monitoring
NAME                                                   READY     STATUS    RESTARTS   AGE
alertmanager-prom-prometheus-operator-alertmanager-0   2/2       Running   0          10m
prom-grafana-6c7c9cf8fc-szkpv                          3/3       Running   0          10m
prom-kube-state-metrics-5648859669-lwxmr               1/1       Running   0          10m
prom-prometheus-node-exporter-2896z                    1/1       Running   0          10m
prom-prometheus-node-exporter-2dwcv                    1/1       Running   0          10m
prom-prometheus-node-exporter-6fk24                    1/1       Running   0          10m
prom-prometheus-node-exporter-9kwvh                    1/1       Running   0          10m
prom-prometheus-node-exporter-9w6bc                    1/1       Running   0          10m
prom-prometheus-node-exporter-g9v4v                    1/1       Running   0          10m
prom-prometheus-node-exporter-jqpjk                    1/1       Running   0          10m
prom-prometheus-node-exporter-ph2xz                    1/1       Running   0          10m
prom-prometheus-node-exporter-q46bn                    1/1       Running   0          10m
prom-prometheus-node-exporter-tfdzs                    1/1       Running   0          10m
prom-prometheus-operator-operator-6d645ff4d6-lkc98     1/1       Running   0          10m
prometheus-prom-prometheus-operator-prometheus-0       3/3       Running   1          10m

⚡ kubectl get ingress -n monitoring
NAME          HOSTS                       ADDRESS   PORTS     AGE
prom-grafana  grafana.test.akomljen.com             80, 443   10m
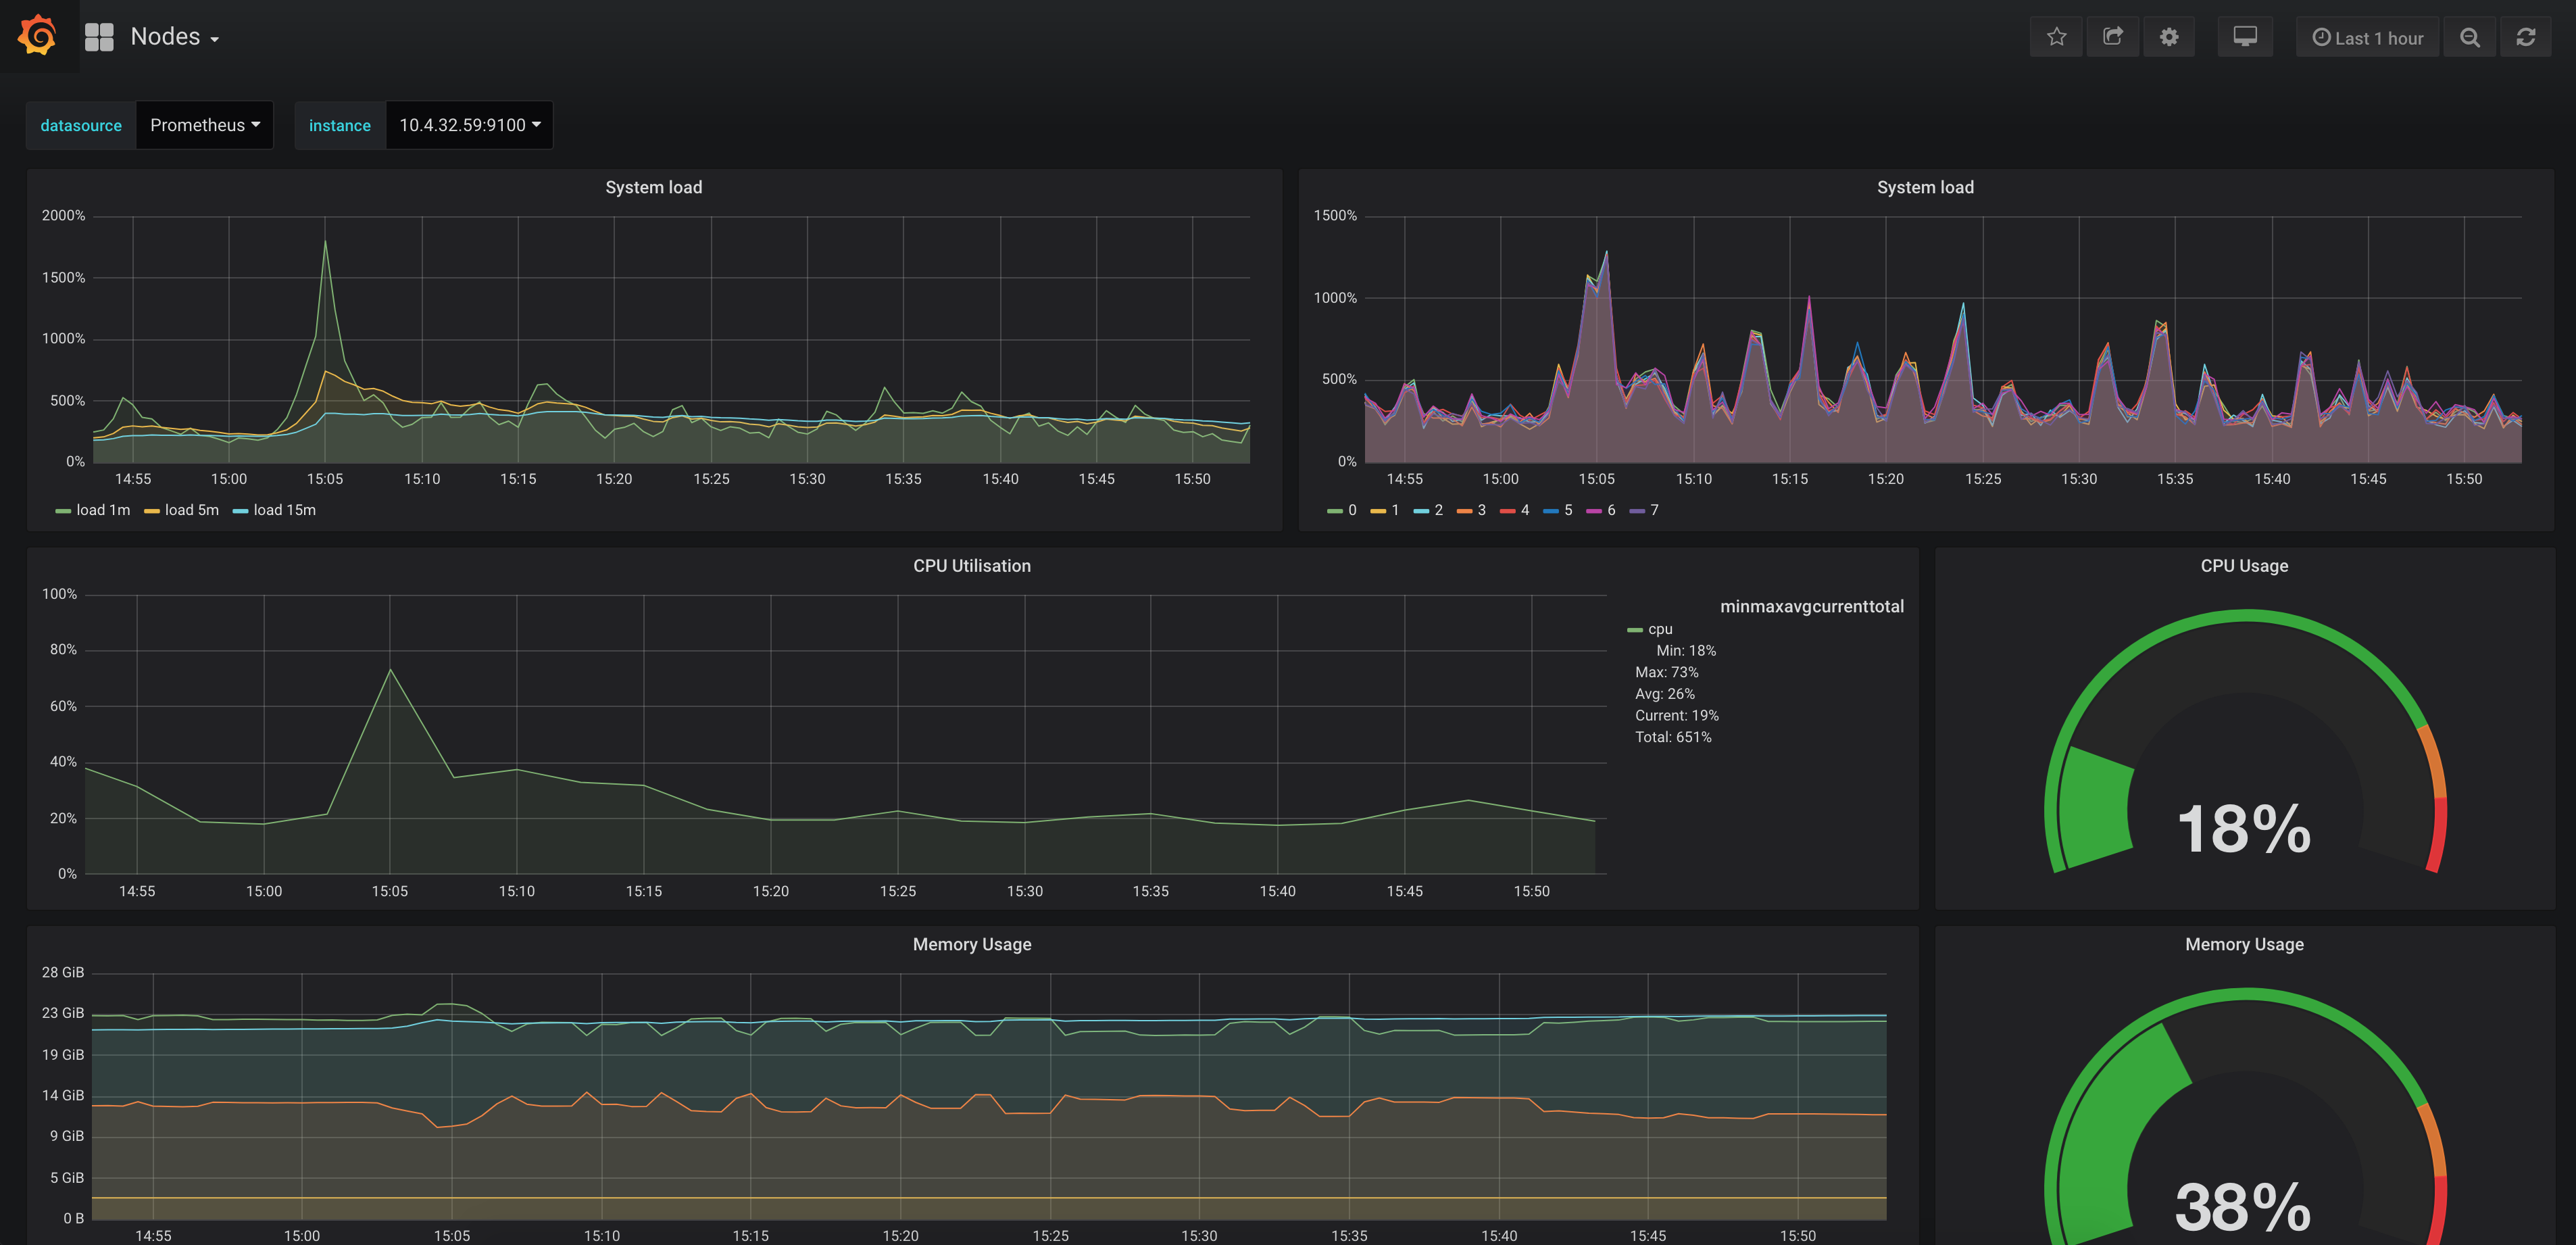
Grafana default dashboards are present when you log in. Of course, you can always update them, or create a completely new dashboard if you need to. In the example below you can see how the node view looks like:
If you want to access other services you can forward the port to localhost, for example:
# Alert manager
⚡ kubectl port-forward -n monitoring alertmanager-prom-prometheus-operator-alertmanager-0 9093

# Prometheus server
⚡ kubectl port-forward -n monitoring prometheus-prom-prometheus-operator-prometheus-0 9090
When you expose Prometheus server to your localhost, you can also check for alerts at http://localhost:9090/alerts. You could also use ingress to expose those services, but, they don't have authentication so you would need something like OAuth Proxy in front.
Summary
It is almost impossible not to experience any issues with Kubernetes cluster once you start to use it. This monitoring setup will help you along the way. Of course, this is only one part of monitoring, and it's mostly cluster related. Many cloud-native applications have Prometheus support out of the box, so getting application metrics should be the next step. I will cover this in some future blog post. Stay tuned for the next one.